
How to Frame a Basement Wall (2026): Step-by-Step Guide

Quick answer: Fix any water problem first, then put continuous rigid foam against the concrete. Build a 2x4 wall in front of it, studs 16" on centre, on a pressure-treated bottom plate fastened with 16d concrete nails, powder-actuated pins or concrete screws. Plumb it, fireblock it, fill the cavity with unfaced batts, then drywall. No polyethylene on the inside — that single mistake is what grows mould behind these walls.
One thing worth knowing before you start: a basement partition is not a bearing wall, so the anchor-bolt section everyone quotes at it does not apply. Those 7" embedment figures belong to sill plates on a foundation wall. Your slab is 4" thick.
| Question | Short answer |
|---|---|
| Does my wall carry load? | If not, R403.1.6 anchor bolting does not apply to it |
| What fastens the plate? | 16d concrete nails at 16" o.c., powder-actuated pins, or Tapcons |
| Treated bottom plate? | Yes — it costs a few dollars and ends the argument |
| Vapor barrier on the inside? | No. That is the mistake that grows mold. |
| Do I need floating walls? | Only in expansive-soil regions. Ask your building department. |
| Fireblocking? | Yes. R302.11 names furred spaces specifically. |
Code note. The sections cited here are from the US International Residential Code. Local amendments vary, and Canada uses the NBC rather than the IRC — check fastening, fireblocking, insulation and egress requirements with your own building department before you start. Every figure on this page is cited to the code section, the manufacturer specification or the research paper it comes from. Where competent people disagree, this page says so instead of picking a side.
Author: Thomas Leroy, Construction & Renovation Specialist
Fifteen years of hands-on residential construction and renovation, using most of the power tools on the market across a wide range of brands. Framing a basement wall is the job where the internet is most confidently wrong — half the guides quote a sill-plate anchoring spec that physically cannot be met in a 4-inch slab, and most of them recommend a wall assembly that Building Science Corporation studied and called unsuitable for the home building industry. Everything below is cited to the code section, the manufacturer data or the research paper it came from.
How to Frame a Basement Wall: the 11 Steps
The whole job in order. The sequence matters more than any single step — foam before framing, fireblocking before finish, radon before all of it. Each step links down to the section that covers it in detail.
| # | Step | Why |
|---|---|---|
| 1 | Test for radon | Before anything else. Mitigation is cheap now, expensive later. |
| 2 | Fix the water | Bulk water first. Foam and framing do not fix a leaking wall. |
| 3 | Seal and coat the wall | Masonry waterproofing coating slows capillary migration. |
| 4 | Rigid foam against the foundation | Continuous, seams sealed, unfaced, foam-safe adhesive. |
| 5 | Lay out the wall | Chalk the plate line. Check joist direction for the top plate. |
| 6 | Cut and assemble | Crown all studs the same way. Build flat where there is room. |
| 7 | Set the treated floor plate | Fasten per the schedule. Hot-dipped galvanized fasteners. |
| 8 | Stand and plumb | Plumb every 4 ft against the foundation, which is rarely straight. |
| 9 | Fireblock | Before the finish goes on. Ceiling and floor level, and every 10 ft. |
| 10 | Insulate the cavity | Unfaced batts or damp-spray cellulose. No interior poly. |
| 11 | Drywall | 1/2 in. minimum. It is also the thermal barrier the foam requires. |
Test for Radon Before You Frame Anything
Test before you frame anything. Finishing a basement reduces natural ventilation and can concentrate radon, and retrofitting mitigation into a finished basement means opening the walls again. EPA action level is 4.0 pCi/L.
IRC Appendix F -- renamed Appendix BE in the 2024 IRC -- covers radon control, but it is an OPTIONAL appendix. A jurisdiction has to adopt it explicitly.
Sub-slab depressurization: a vent pipe from beneath the slab, routed through the house and terminating above the roof. Run it during framing and it hides inside a wall.
EPA research found homes with active radon systems also show statistically significant reductions in basement humidity -- so it helps the moisture problem too.
Source: IRC Appendix F / BE; US EPA; CMHA TEK 06-15A; Environmental Law Institute
Partition or Bearing Wall — They Are Not the Same Job
Every page-one result treats 'framing a basement wall' as one task. IRC R403.1.6 governs sill plates and bearing walls: 1/2 inch anchor bolts, 7 inch embedment, 6 ft on centre, two per plate, one within 12 inches of each end but not closer than seven bolt diameters. An interior partition against a foundation wall carries none of that.
Source: IRC R403.1.6; American Wood Council FAQ; Powers Specification & Design Manual
So the first question is not which fastener to buy. It is whether anything is sitting on top of your wall. A perimeter partition against the foundation holds insulation, wiring and drywall. It needs to not slide and not fall over. A wall carrying joists from above is a different animal and belongs to a different code section — that is the cast-in-place anchor bolt case, not this one — and if you are not certain which you have, that is the moment to ask a building official rather than a search engine.
The Assembly That Stops It Growing Mold
This is what actually ruins finished basement walls. Not the fastening. The wall that fails is almost never the one whose plate came loose — it is the one that grew mold in the cavity within three years.
Building Science Corporation studied basements built with fiberglass batts between studs against the foundation, and with polyethylene on the interior face. Their conclusion: both approaches are 'unsuitable for use by the home building industry due to serious problems associated with mold, decay and odors.' Their own photo captions read 'water trapped behind polyethylene installed directly against foundation wall' and 'frame wall with interior vapor barrier resulting in mold, decay and odors.'
Concrete is always damp. Trap that moisture against a cold wall behind a Class I vapor retarder and it condenses inside the cavity. Interior poly stops the wall drying inward, which is the only direction it can dry.
What to build instead
- Rigid foam directly against the foundation, continuous behind the frame wall
- Seams sealed so the foam is an air barrier and a capillary break
- Foam must be vapor semi-permeable, greater than 0.1 perm -- no foil facing, no plastic facing
- Frame wall cavity insulated with UNFACED fiberglass or damp-spray cellulose
- No Class I vapor retarder on the interior. The wall must dry inward.
The permeability numbers are what settle the usual argument about which board to buy:
| Board | Perm rating | Verdict |
|---|---|---|
| Type-II EPS, 1 in. | ~3 perms | dries fastest |
| Type-II EPS, 2 in. | ~1.5 perms | still fine |
| XPS, 1 in. | 1 to 1.5 perms | fine |
| Foil-faced polyiso | ~0.05 perms | Class I retarder -- this is the one to avoid |
Family Handyman tells readers 'be sure you use XPS, other types of foam board are not as moisture resistant.' That is not the real consideration. EPS and XPS both sit in the workable range. What disqualifies a board is the FACING, not the type.
Source: BSC BA-0202 Basement Insulation Systems (Yost & Lstiburek); BSC Info-511; DOE Building America Solution Center
Fastening the Bottom Plate
Five methods work. Which one you pick depends on whether you own a powder tool, whether you want the plate to come back up one day, and whether the slab is flat. If you are still deciding between fastener families, the concrete fastener types guide covers wedge, sleeve, drop-in and screw anchors side by side, and edge distance and spacing matters more than most people expect once you are near a slab edge.
| Method | Best for | Use | Spacing |
|---|---|---|---|
| 16d concrete nail | Cheapest | Bottom plate to slab, non-bearing partition | 16 in. o.c. |
| Powder-actuated fastener | Fastest | Fastest method for interior partition plates | per ESR-2690 table |
| Concrete screw (Tapcon) | Best for DIY | Bottom plate where a removable fastener is wanted | 16 in. o.c. typical |
| Hammer-drive anchor | Permanent, no powder tool | Alternative to a PAF where a powder tool is not available | as required |
| Wedge / sleeve / epoxy anchor | Structural loads | Bearing wall sole plates, steel column bases | per design |
16d concrete nail
3.5 in. x 0.135 in.
Source: Commerce City CO Typical Basement Finish Details, Table 2 (2021 IRC)
Powder-actuated fastener
Min 1-3/4 in. from concrete edge, driven into the centre of the plate, 6 in. from plate ends. Concrete f'c >= 2,500 psi. Plate lumber specific gravity >= 0.50. Wall laterally supported top and bottom. Embedment 5/8 in. to 1-1/2 in.; beyond that the pin can bend or 'fishhook' and lose capacity.
Source: ICC-ES ESR-2690 (ITW Ramset); Powers Spec & Design Manual; JLC Field Guide
Concrete screw (Tapcon)
Embedment 1 in. minimum, 1-3/4 in. maximum. 3/16 in. screw takes a 5/32 in. bit; 1/4 in. screw takes a 3/16 in. bit. Drill 1/4 to 1/2 in. deeper than the screw penetrates to leave a dust reservoir. Length = plate thickness + 1 in., so a 1-1/2 in. plate needs 2-1/2 in. minimum. Full pilot-hole and length tables are in the Tapcon sizing guide.
Source: Confast / Concrete Fastening Systems technical specifications
Hammer-drive anchor
Permanent once set; cannot be removed.
Source: JLC Field Guide: Anchors
Wedge / sleeve / epoxy anchor
Use a sleeve anchor where the slab is uneven and the plate must be drawn down. Wedge or epoxy for a structural post base.
Source: JLC Field Guide: Anchors
Do You Actually Need a Treated Bottom Plate?
IRC R317.1 item 3: 'Sills and sleepers on a concrete or masonry slab that is in direct contact with the ground unless separated from such slab by an impervious moisture barrier.'
'In direct contact with the ground' qualifies the SLAB, not the wood. ICC commentary: 'Concrete that is fully separated from the ground by a vapor barrier is not in direct contact with earth.'
R317.1 item 7 covers this application directly: 'Wood furring strips or other wood framing members attached directly to the interior of exterior masonry walls.'
Use a treated plate. It costs a few dollars and takes the argument off the table. Competent people genuinely disagree about how to read the word “directly” here, and this page is not going to pretend the argument is settled. What is not in dispute is that a treated plate satisfies the requirement in every reading of it.
Source: IRC R317.1; ICC Commentary; JLC 'Attaching Wood to Concrete'
Floating Walls
In expansive-soil regions the slab heaves. A floating partition hangs from the floor framing above and is NOT locked to the slab, so the slab can rise without jacking the wall into the joists.
| Detail | Specification |
|---|---|
| Gap | 1-1/2 in. to 3 in. |
| Spike | 60d spikes (6 in. x 0.238 in.) at 24 in. o.c. |
| Pre-drill | Pre-drill the plate with a 1/4 in. bit to accept the 60d spike |
| Floor plate | A preservative-treated floor plate is anchored to the slab per Table 2; the floating plate sits above it with the gap between. |
| Baseboard | Baseboard fastens to the bottom plate only, never through to the floor plate, or the wall cannot move. |
| Alternative | The floating connection may be made at the top instead. |
| Required at | Floating connections at the TOP are required for partitions surrounding shower compartments. |
| What may float | Only non-load-bearing partitions may float. |
Colorado Front Range, Wyoming (Casper, Gillette), and other expansive-clay regions. Some jurisdictions require it, others strongly advise it. Ask the building department during plan review what clearance detail they want on the drawings.
Source: Commerce City CO Figures 8 and 9 (2021 IRC); Colorado Chapter ICC basement guide
Fireblocking
Fireblocking is the part of this job most likely to be skipped and least likely to be noticed until it matters. It costs almost nothing in materials and takes minutes, and it is the difference between a fire staying in one room and running the height of the house inside a wall cavity nobody can see into. IRC R302.11 lists the places it is required, and several of them apply to a basement perimeter wall.
R302.11 item 1 names 'furred spaces and parallel rows of studs' explicitly. A basement perimeter wall standing off the foundation is exactly that -- a second row of studs with a concealed cavity behind it. Leave it out and the cavity behind your drywall is a chimney.
Where it goes
- 1.1 Vertically at the ceiling and floor levels
- 1.2 Horizontally at intervals not exceeding 10 feet
- At interconnections between concealed vertical and horizontal spaces -- soffits, drop ceilings, cove ceilings
- In concealed spaces between stair stringers at the top and bottom of the run
- At openings around vents, pipes, ducts, cables and wires at ceiling and floor level
What counts as fireblocking
- 2 in. nominal lumber
- Two thicknesses of 1 in. nominal lumber with broken lap joints
- 23/32 in. wood structural panel, joints backed by the same
- 3/4 in. particleboard, joints backed by the same
- 1/2 in. gypsum board
- 1/4 in. cement-based millboard
- Batts or blankets of mineral wool or glass fiber, securely retained
Install fireblocking before the wall finish goes on.
Source: IRC R302.11, R302.11.1, R302.11.1.2, R302.11.1.3; Commerce City Figures 5-7
Framing Specs
| Item | Requirement |
|---|---|
| Studs | 2x4 or 2x6 utility grade or better |
| Spacing | 16 in. o.c., may go to 24 in. o.c. where the applied finish is drywall |
| Plates | Single preservative-treated bottom plate, or a floor plate where the partition floats. Single or double top plate permitted. |
| Simple header | A single flat 2x4 works as a header in a non-bearing partition for openings up to 8 ft, provided the partition above the opening is not more than 24 in. high. |
| Header nailing | Two-ply headers: 16d common at 16 in. o.c., or 16d box at 12 in. o.c., staggered top and bottom edges. |
| Notching | Non-bearing partition studs: drilled hole max 60% of stud depth (2-1/8 in. for a 2x4); notch max 40% (1-3/8 in. for a 2x4, 2-3/16 in. for a 2x6); 5/8 in. minimum to the edge; holes and notches not in the same cross section. |
| Ceiling height | Not less than 7 ft above finished floor. Beams, girders and ducts may project to within 6 ft 4 in. |
| Top plate | Where floor framing runs perpendicular to the partition, add 2x blocking at 24 in. o.c. to catch the top plate. |
The 16d and 60d callouts above are penny sizes, not lengths — the nail size chart explains what each one actually measures and why an 8d common and an 8d box are different diameters.
Header size by span
These are for headers carrying load. A flat 2x4 in a non-bearing partition spans further than a doubled 2x4 in a bearing wall for the obvious reason — it is holding up drywall, not the floor above. Use this table only where something bears on the wall.
| Header | Maximum span |
|---|---|
| (2)2x4 | 4 ft |
| (2)2x6 | 6 ft |
| (2)2x8 | 10 ft |
| (2)2x10 | 12 ft |
| (2)2x12 | 16 ft |
Source: Commerce City CO Typical Basement Finish Details (2021 IRC)
How Much Insulation the Code Wants
IRC N1102.1.3 (N1102.1.2 in the 2015 and 2018 editions) sets the minimum. The notation trips people up: '10/13' means R-10 CONTINUOUS insulation OR R-13 CAVITY insulation -- not both. People read it as a sum and over-build, or pick the cavity option without realising what it implies.
Basement wall insulation is not required in warm-humid locations.
Source: IRC N1102.1.3; DOE Building America Solution Center
Framing Around a Basement Window
This is where framing crosses into life safety, and it is the one part of the job a homeowner can get badly wrong without realising. IRC R310 requires an emergency escape and rescue opening in every basement, and in every sleeping room inside it — one window in the hallway does not cover a bedroom.
| Requirement | Minimum |
|---|---|
| Net clear opening | 5.7 sq ft (5.0 sq ft for a grade-floor or below-grade opening) |
| Clear opening height | 24 in. |
| Clear opening width | 20 in. |
| Sill height above the finished floor | 44 in. maximum |
| Operation | From inside, without keys, tools or special knowledge |
| Window well area | 9 sq ft, with a 36 in. projection and width |
| Well deeper than 44 in. | Permanently affixed ladder or steps |
Those are opening dimensions obtained by normal operation of the window from the inside — the sash has to actually swing or slide clear. A window that measures 5.7 sq ft as a rough opening but only opens halfway does not comply.
Building the opening
Frame the opening with a header sized from the span table above, jack studs under each end, and king studs full height either side. In a non-bearing partition a single flat 2x4 works as a header up to an 8 ft opening provided the wall above it is not more than 24 in. high — which covers most basement windows without any header calculation at all.
Return the framing into the window opening with jamb extensions so the drywall has something to land on, and keep the rigid foam running continuous across the concrete right up to the window buck. The reveal around a basement window is a classic cold spot and a classic place for condensation, precisely because people stop the insulation short there.
Source: IRC R310.1, R310.2.1, R310.2.2, R310.2.3; Commerce City CO header table (2021 IRC)
Framing Around Ductwork and Beams
Basements are full of things in the way. The code gives you more room than most people expect, and one specific allowance for exactly this problem.
| Situation | Requirement |
|---|---|
| Finished ceiling height | 7 ft minimum above the finished floor |
| Beams, girders, ducts | May project down to within 6 ft 4 in. |
| Soffit framing | 2x2 or 2x4, whatever carries the drywall |
| Fireblocking | Required where the soffit connects to a wall cavity |
That 6 ft 4 in. allowance is the useful part. A duct trunk hanging 8 in. below the joists does not automatically cost you the room — box it in, keep the finished underside above 6 ft 4 in., and the rest of the ceiling can stay at full height.
The soffit is a concealed space
A boxed soffit running along a duct connects to the stud cavities it passes. That is exactly the interconnection R302.11 calls out: concealed spaces between stud walls and soffits or drop ceilings need fireblocking where they meet. Build the soffit, then block the connection before the drywall goes on. Cutting the openings for vents and outlets in a finished soffit is what a drywall cut-out tool is for.
Source: Commerce City CO Typical Basement Finish Details (2021 IRC); IRC R302.11
Furring Strips vs a Stud Wall
Furring strips fastened flat to the foundation are the fast way to get a drywall surface, and in a low basement they can be the only way to keep the ceiling height. They are a genuine option, but they change what the wall can do.
| Furring strips | Stud wall | |
|---|---|---|
| Space lost | About 1 in. | 4 in. or more |
| Insulation | Only what fits behind the strips | Full cavity plus continuous foam |
| Wiring | Very little room | Normal stud bays |
| Plumb correction | Follows the foundation, warts and all | Shim to plumb independently |
| Treated lumber | Required — R317.1 item 7 | Required at the bottom plate |
IRC R317.1 item 7 covers this application by name: wood furring strips or other wood framing members attached directly to the interior of exterior masonry walls must be preservative-treated or naturally durable. That is not a grey area the way the bottom-plate question is — furring against masonry is called out explicitly.
Where furring genuinely wins is a basement with 7 ft 2 in. of headroom and a duct in the way, or a wall you only need to finish rather than insulate to code. Where it loses is anywhere you want R-13 in the wall, a run of outlets, or a plumb surface in front of a foundation that is not.
Source: IRC R317.1 item 7; IRC N1102.1.3
Tools and Fasteners
Drilling into a basement slab and foundation wall is the part of this job that needs real tools. A standard drill with a masonry bit will get through soft concrete or block, slowly and at the cost of the bit. For anything harder, or more than a couple of holes, you need percussion — and above about 3/8" you want a rotary hammer. If you are not sure which you have, the hammer drill vs regular drill comparison covers the mechanical difference.
Materials
These are lumberyard and big-box purchases rather than online ones, so there are no links here. What matters is the specification, not the brand.
| Material | How much | What to check |
|---|---|---|
| Rigid foam board | 2 in. for R-10 continuous, which satisfies most climate zones on its own | Unfaced XPS or Type-II EPS. Not foil-faced — facing drops it to about 0.05 perm and turns it into the vapor retarder you are trying to avoid. |
| Foamboard adhesive | One 10 oz cartridge covers roughly 32 ft at a 1/4 in. bead | Must be a foamboard formulation — Loctite PL300 or equivalent. Standard solvent construction adhesive dissolves polystyrene. |
| Pressure-treated 2x4 | Bottom plate only | Plus hot-dipped galvanized fasteners. Modern copper-based treatment corrodes plain steel. |
| Sill seal | 3-1/2 in. wide roll for a 2x4 plate | Closed-cell foam gasket under the plate. It breaks capillary contact between damp concrete and the wood and costs a few dollars. Whether it satisfies R317.1’s “impervious moisture barrier” is a question for your inspector — use a treated plate either way and the question never comes up. |
| Unfaced batt | R-13 for a 2x4 wall, R-19 needs 2x6 | Unfaced, or damp-spray cellulose. A kraft or foil facing traps moisture against the foam. |
| Powder-actuated tool | Only if you are shooting a whole perimeter | A hammer-actuated .22 tool is enough for one basement, and the trigger-actuated versions get better reviews from people who have owned both — though that is buyer feedback, not testing. Needs a trained operator either way; the tools ship with a user exam for a reason. |
Concrete screws
The removable option. Worth it if you might ever want the plate back up, or if you are working somewhere a powder charge is a bad idea.


Hammer drills
Fine for the smaller pilot holes a partition needs. Full picks in the best hammer drill for home use guide.



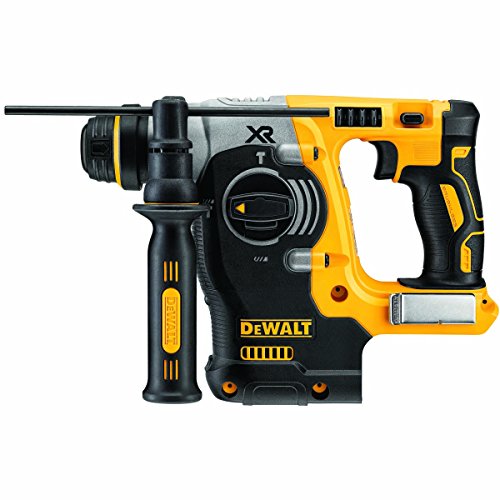
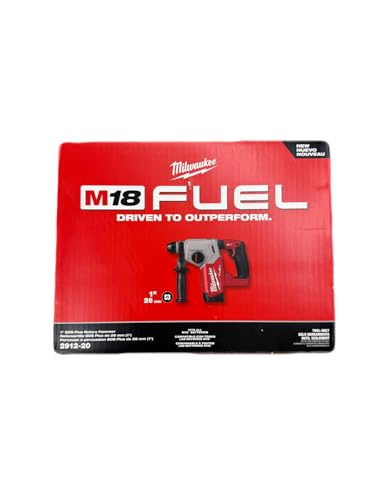
Rotary hammers
Worth it if you are drilling a whole basement perimeter, or going above 3/8" diameter. The SDS-Plus rotary hammer comparison covers four brands on the same specs.



Bits
SDS-Plus for a rotary hammer, round shank for a standard drill — they do not interchange. See concrete drill bits for the shank difference, or masonry drill bits for cutter geometry and rebar.


Layout
A self-levelling laser saves resetting a spirit level at every stud on a long wall, and basement foundations are rarely plumb.


Prices and availability change — links go to current Amazon listings. As an Amazon Associate, BuildToolHQ earns from qualifying purchases.
Common Mistakes
Two numbers worth committing to memory before you start: a powder-actuated pin needs 1-3/4 in. of clearance from the edge of the concrete, and the radon action level is 4.0 pCi/L. Both are easy to overlook and expensive to discover late.
These are the ones specific to basement walls. For the drilling itself, common mistakes when drilling into concrete covers the rest.
Frequently Asked Questions
Do I need a pressure treated bottom plate in a basement?
Use one. IRC R317.1 requires treated or naturally durable wood for sills and sleepers on a slab that is in direct contact with the ground, unless separated from the slab by an impervious moisture barrier. There is real disagreement about how to read that when foam or poly sits between, and a vapor barrier under the slab does not exempt you. A treated plate costs a few dollars and satisfies every reading of the requirement.
How do you attach a bottom plate to a concrete floor?
For a non-bearing partition, 16d concrete nails at 16 inches on centre, powder-actuated pins, or concrete screws all work. Powder-actuated is fastest; concrete screws are the only option that comes back out. Anchor bolts are for sill plates and bearing walls, and R403.1.6 wants them set 7 inches into the concrete — that is embedment depth, not bolt length. A 4 inch slab cannot give you 7 inches of anything.
What size Tapcon for a bottom plate?
Embedment must be 1 inch minimum and 1-3/4 inch maximum, so add 1 inch to the plate thickness. A 1-1/2 inch treated plate needs a 2-1/2 inch screw. A 3/16 inch screw takes a 5/32 inch pilot bit; a 1/4 inch screw takes a 3/16 inch bit. Drill 1/4 to 1/2 inch deeper than the screw penetrates so dust has somewhere to go.
Should I put a vapor barrier on a basement wall?
Not on the interior face. Building Science Corporation studied basements built with interior polyethylene and with fiberglass batts against the concrete, and concluded both approaches are unsuitable due to mold, decay and odors. Put rigid foam against the foundation instead, keep it unfaced so it stays above 0.1 perm, and let the wall dry inward.
Do basement walls need to be floating?
Only in regions with expansive soils - Colorado's Front Range, parts of Wyoming, and similar clay conditions. Where required, the detail is a 1-1/2 to 3 inch gap, 60d spikes at 24 inches on centre through a pre-drilled 1/4 inch hole. Only non-load-bearing partitions may float. Ask your building department during plan review.
Does a basement wall need fireblocking?
Yes. IRC R302.11 names furred spaces and parallel rows of studs specifically, which is exactly what a basement perimeter wall is. Fireblocking goes vertically at ceiling and floor levels and horizontally at intervals not exceeding 10 feet.
How far should a basement wall be from the concrete?
Far enough that the framing is not touching damp concrete, with the rigid foam continuous behind it. The foam is what keeps the wood and the paper-faced drywall away from the moisture source, so it must run behind the wall rather than being cut to fit between studs.
Can I use EPS instead of XPS on a basement wall?
Yes. Type-II EPS runs about 3 perms at 1 inch and 1.5 perms at 2 inches; XPS is 1 to 1.5 perms at 1 inch. Both sit in the workable range. What disqualifies a board is a foil or plastic facing, which drops it to around 0.05 perm and turns it into the Class I vapor retarder you are trying to avoid.
Related Guides
- How to Attach Wood to Concrete — the four fastening methods compared, with drill bit sizes for each
- Best Masonry Drill Bits — cutter geometry, rebar, and what actually wears a bit out
- Foundation Anchor Bolts — the sill-plate case this guide is not about, and the retrofit options
- Concrete Anchor Selection Chart — which anchor for which load and base material
- Screw Coatings — why treated lumber eats plain steel fasteners
- Nail Size Chart — what 16d and 60d actually measure
- Tapcon Drill Bit Size Chart — pilot hole sizes and embedment for every concrete screw diameter
- Drill Bit Size for Anchors — the bit size for every anchor type, including the drop-in exception
- Types of Concrete Fasteners — wedge, sleeve, drop-in and screw anchors compared
- Best Concrete Drill Bits — SDS-Plus and round shank bits, and why they do not interchange
Free Tool · AI-Powered
Plan your whole project in 2 minutes
Tell our AI Foreman what you are building and get a complete tool list, materials shopping list, step-by-step plan, and mistakes to avoid.
Try the AI Foreman →
Thomas Leroy
Founder of BuildToolHQ, drawing on years of hands-on building, fabrication, and technical work, plus deep product and manufacturer research. Every guide is built on real documentation and real product research — not recycled advice — so tradespeople and serious DIYers get the same technical knowledge professionals use every day.
More about ThomasRelated Articles

Best Cordless Cut-Off Tool 2026: DeWalt, Milwaukee, Ryobi & More Compared
Read more
Best Cordless Angle Grinder 2026: DeWalt, Milwaukee, Bosch, Makita
Read more
Drywall Cut-Out Tool: Cut Direction, Bits, and Which One to Buy
Read more
Drywall Screw Gun: How Depth Control Works and Which One to Buy
Read more